Debian GNU Linux文档
Debian下载地址:https://www.debian.org/download.zh-cn.html
Debian12 下载链接:https://cdimage.debian.org/debian-cd/current/amd64/iso-cd/debian-12.11.0-amd64-netinst.iso
本文档使用镜像:debian-12.11.0-amd64-netinst.iso
一、VM vSpshere安装 Debian 12
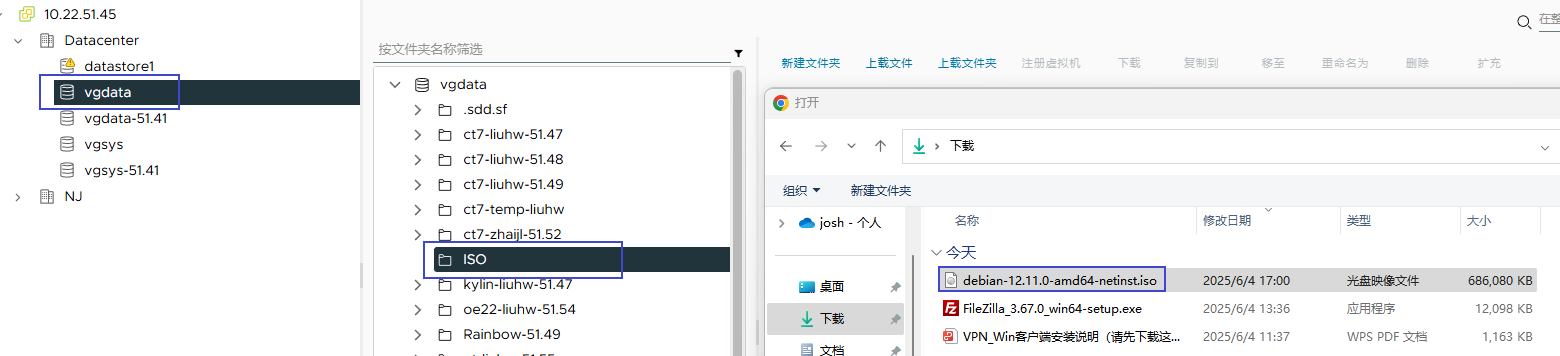
1.1 上传镜像
注意:如果存在多个主机,需要将镜像上传至安装虚拟机一致的主机上,否则后续通过CD/ROM会找不到镜像文件
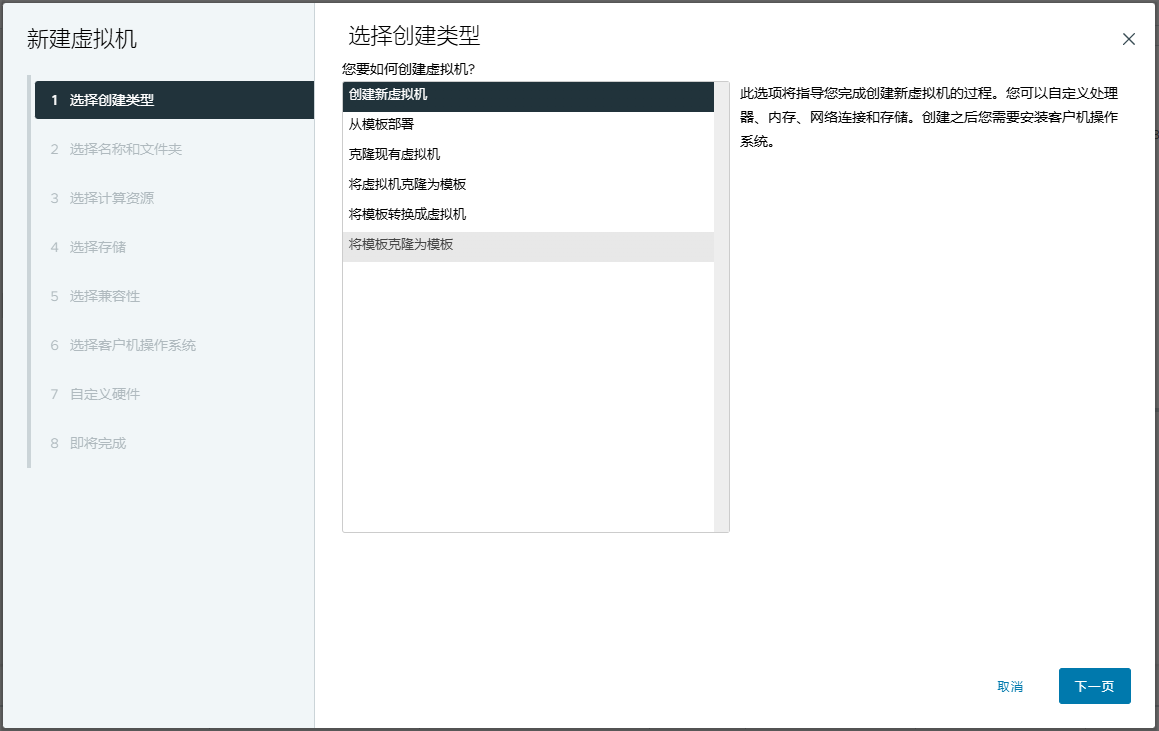
1.2 创建虚拟机
选择一台【VMware ESXi】的物理设备IP,例如10.22.51.41,点击【操作】——【新建虚拟机】

点击【下一页】
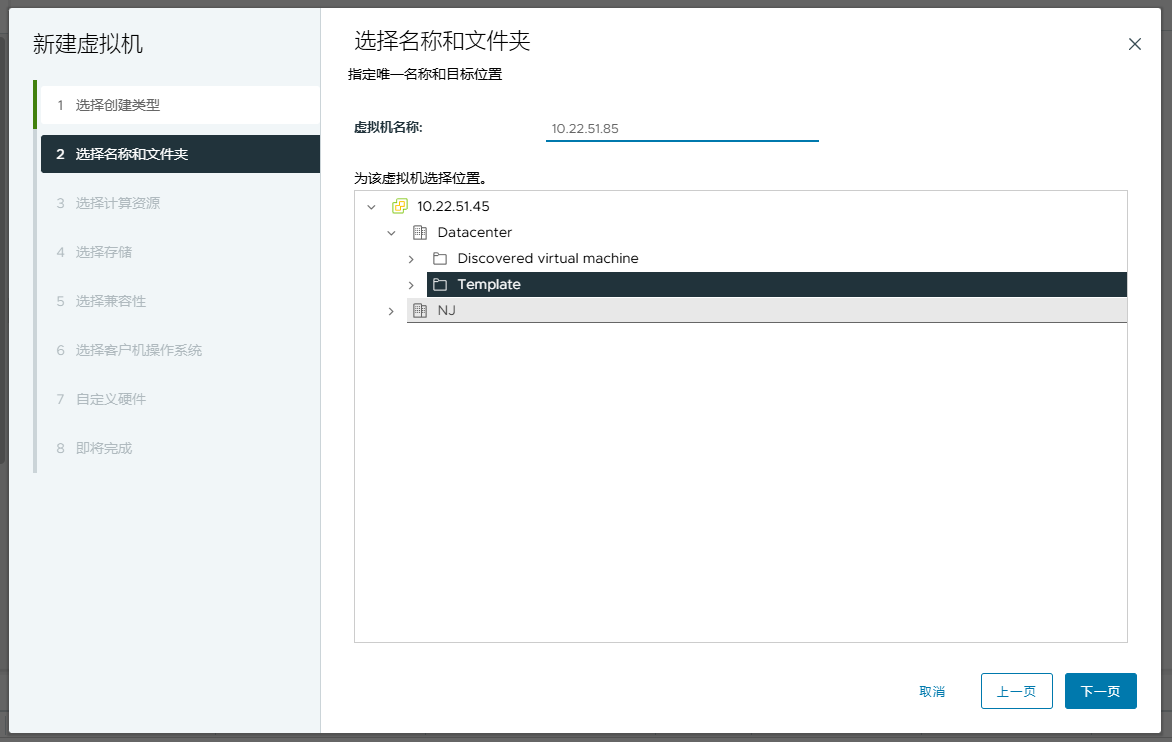
填写虚拟机名称和存放位置
【虚拟机名称】:10.22.51.85
【选择存放位置】:Template
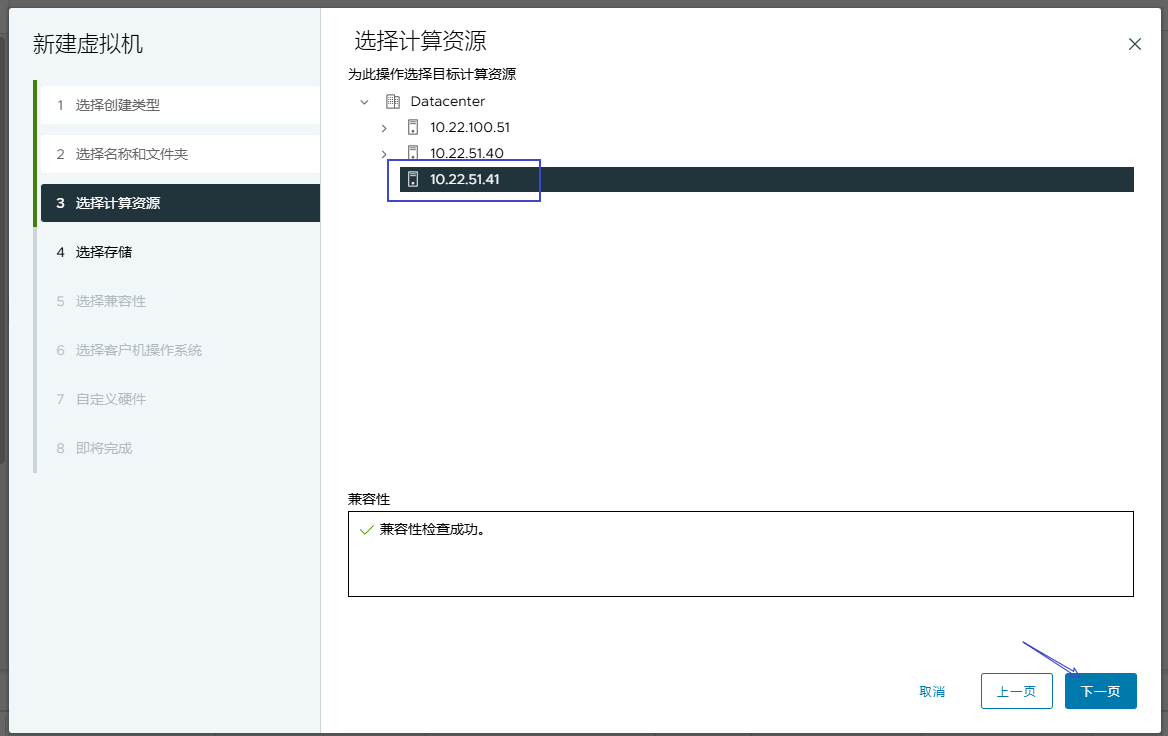
【选择计算资源】
选择ESXI主机其中之一,例如:10.22.51.41,然后点击【下一页】
【选择存储】
存储即虚拟机的硬盘,对于数据存储,需要安全稳定及容量,如存在多个本地磁盘,一般选择容量较大的作为存储即可
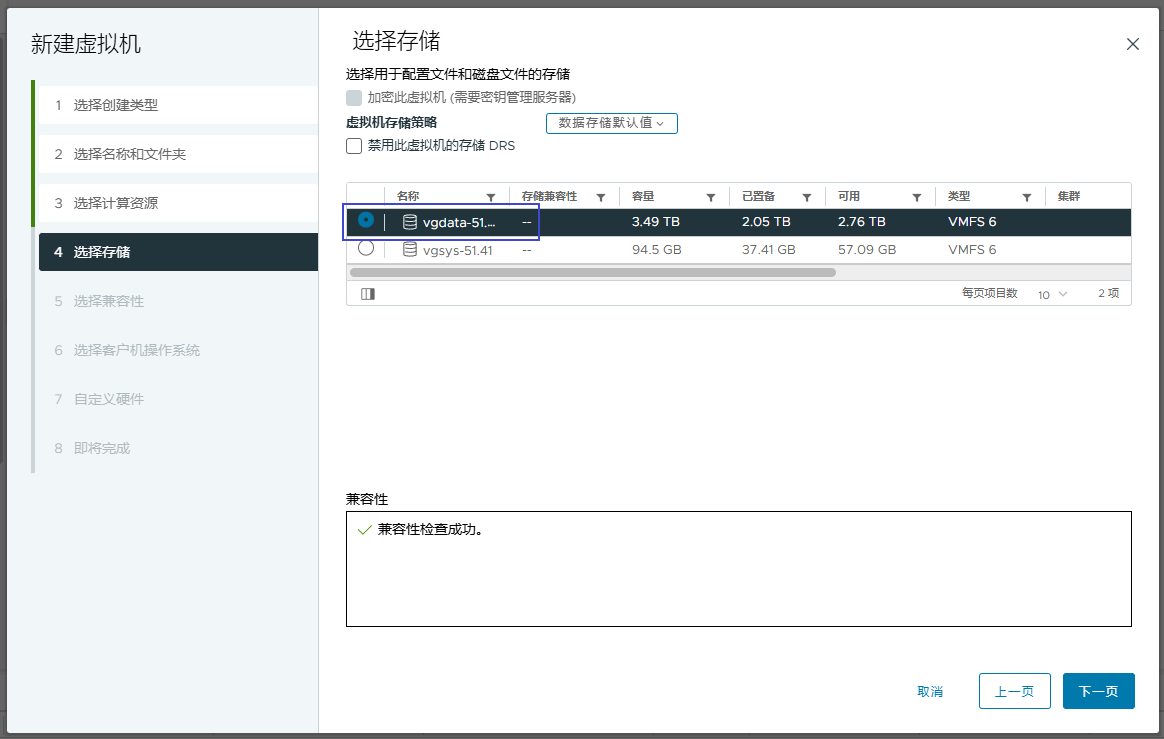
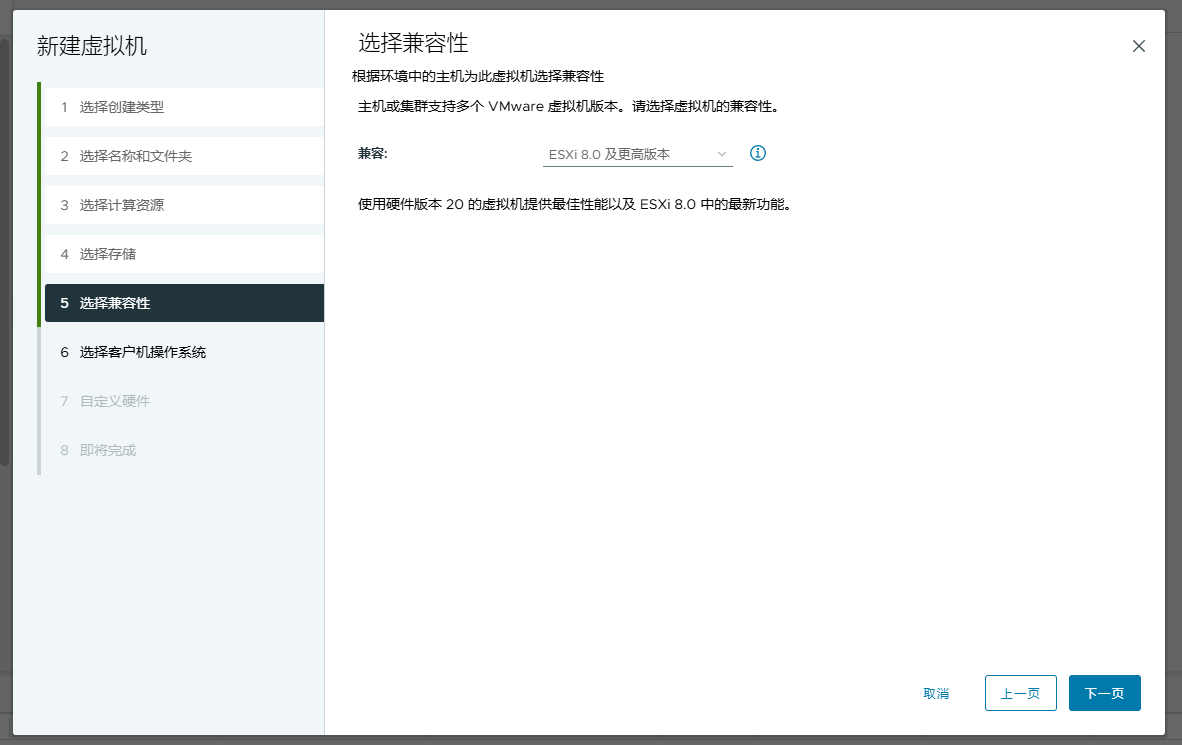
【选择兼容性】:ESXI 8.0 及更高版本
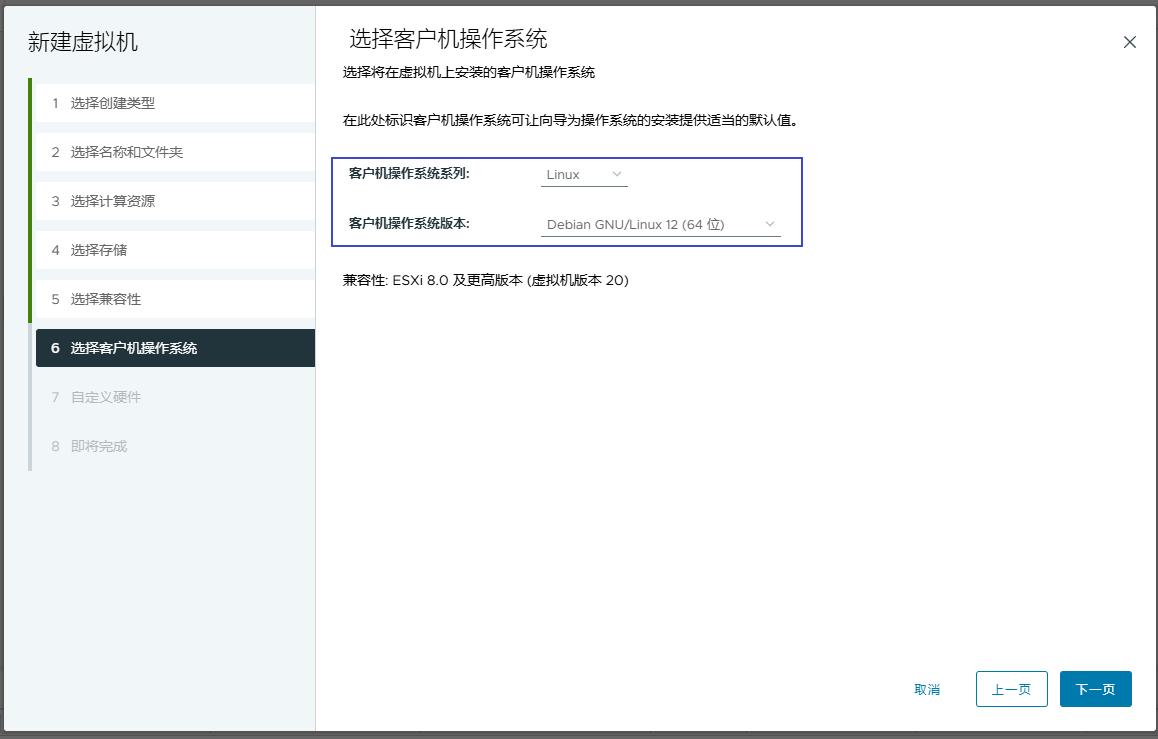
【选择客户机操作系统】
【操作系统】:Linux
【操作系统版本】:Debian GUN/Linux 12(64位)
【自定义硬件】
手动对硬盘配置修改,如CPU、内存、硬盘重要参数
点击 【添加新设备】即可 硬盘、CD/DVD驱动器、SATA控制器
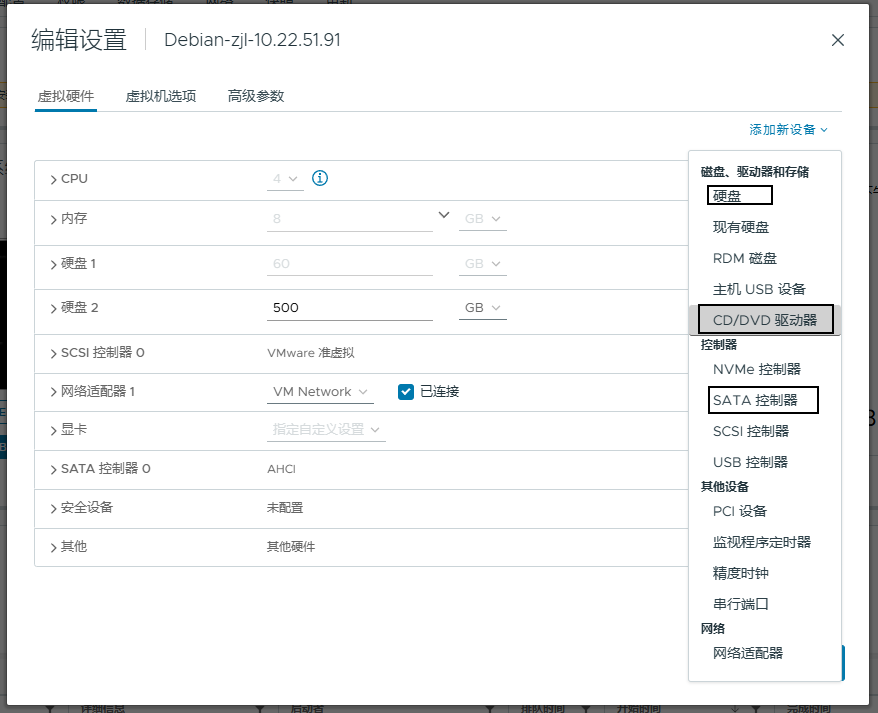
具体修改参数如下:
【CPU】:4C
【内存】:8GB
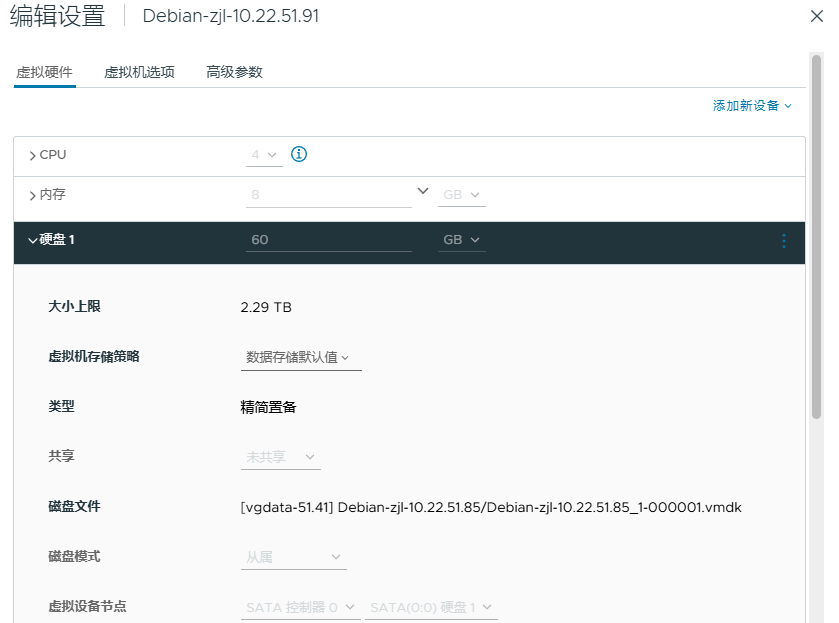
硬盘需要手动改为SATA,并且需要删除原本自动添加的【16G】磁盘,然后添加一块60G和500G磁盘(可选),将两个都设置为SATA
【硬盘1】:60GB 使用SATA控制器0 SATA(0:0)硬盘1
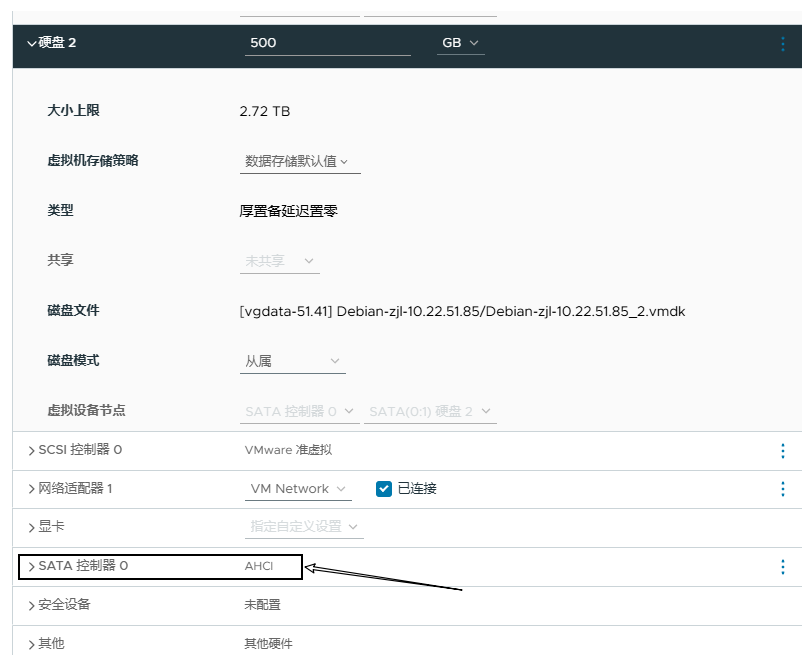
【硬盘2】:500GB 使用SATA控制器0 SATA(0:1)硬盘2
【网络适配器】:VM Network
【SATA控制器 0】: 手动添加SATA控制器
CPU、内存、硬盘1配置截图如下:
硬盘2、网络适配器1、SATA控制器截图如下
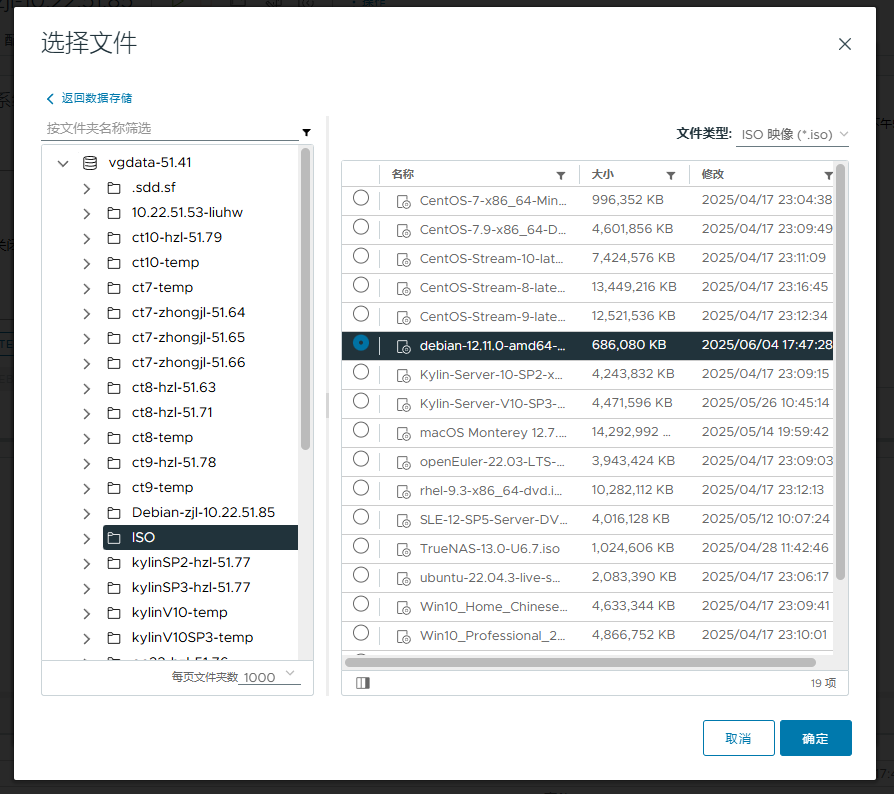
添加CD/DVD驱动器,选择【数据存储ISO文件】,

然后选择镜像文件,【 debian-12.11.0-amd64...iso】,点击【确认】
Ps:所有创建准备工作至此结束,接下来,打开虚拟机电源,进行系统安装
1.3 Debian系统安装
更多的安装的详细过程,请参考此链接:https://blog.csdn.net/networkTalent/article/details/123375048
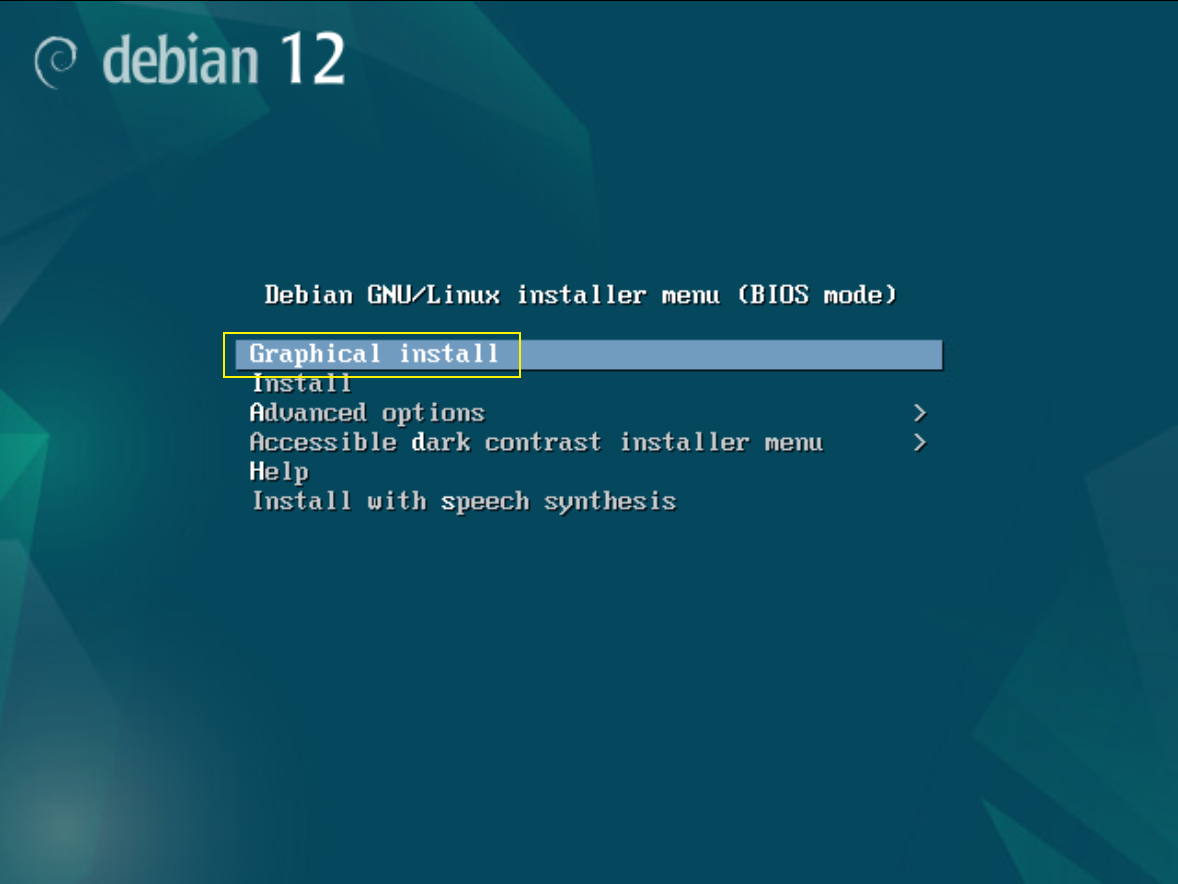
Graphical Install 表示使用图形安装,选择此项即可;
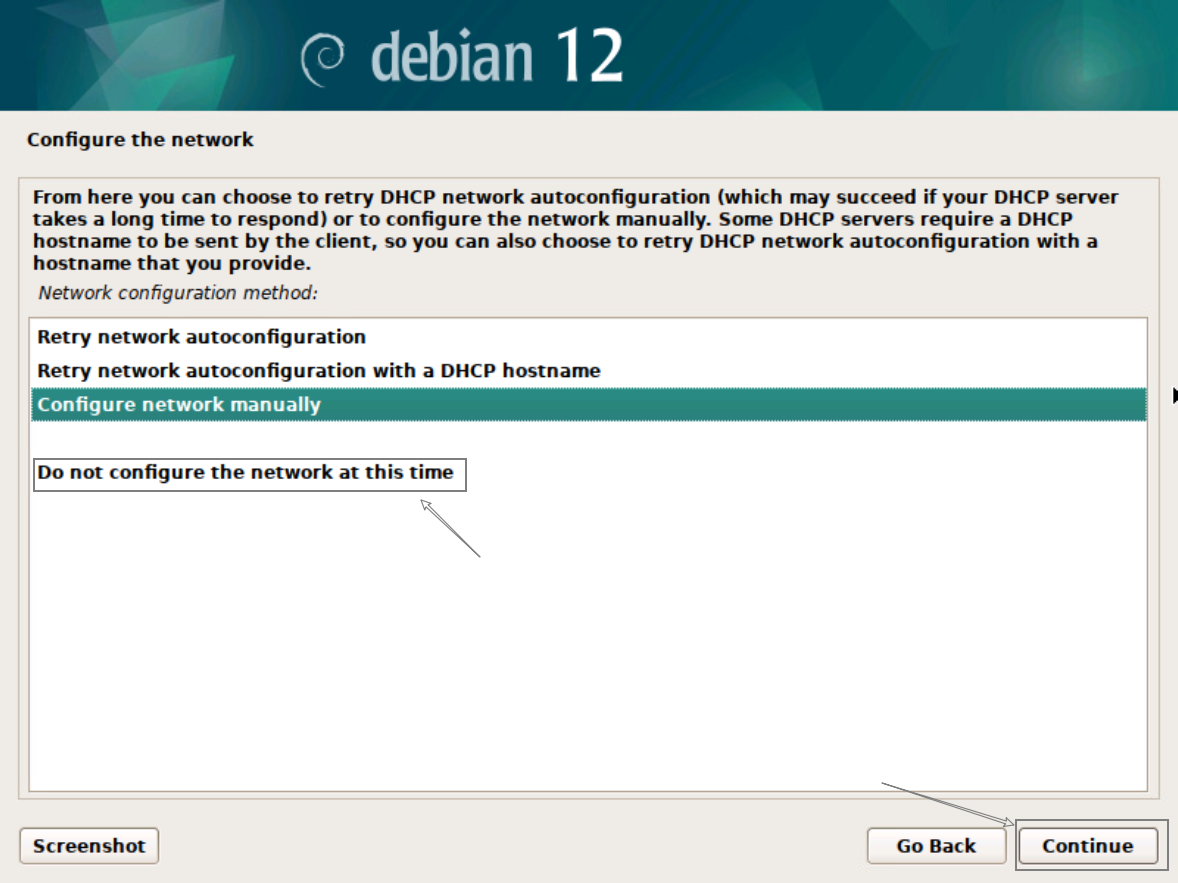
配置网络时,如出现DHCP不可用情况,请选择【此时不要配置网络】
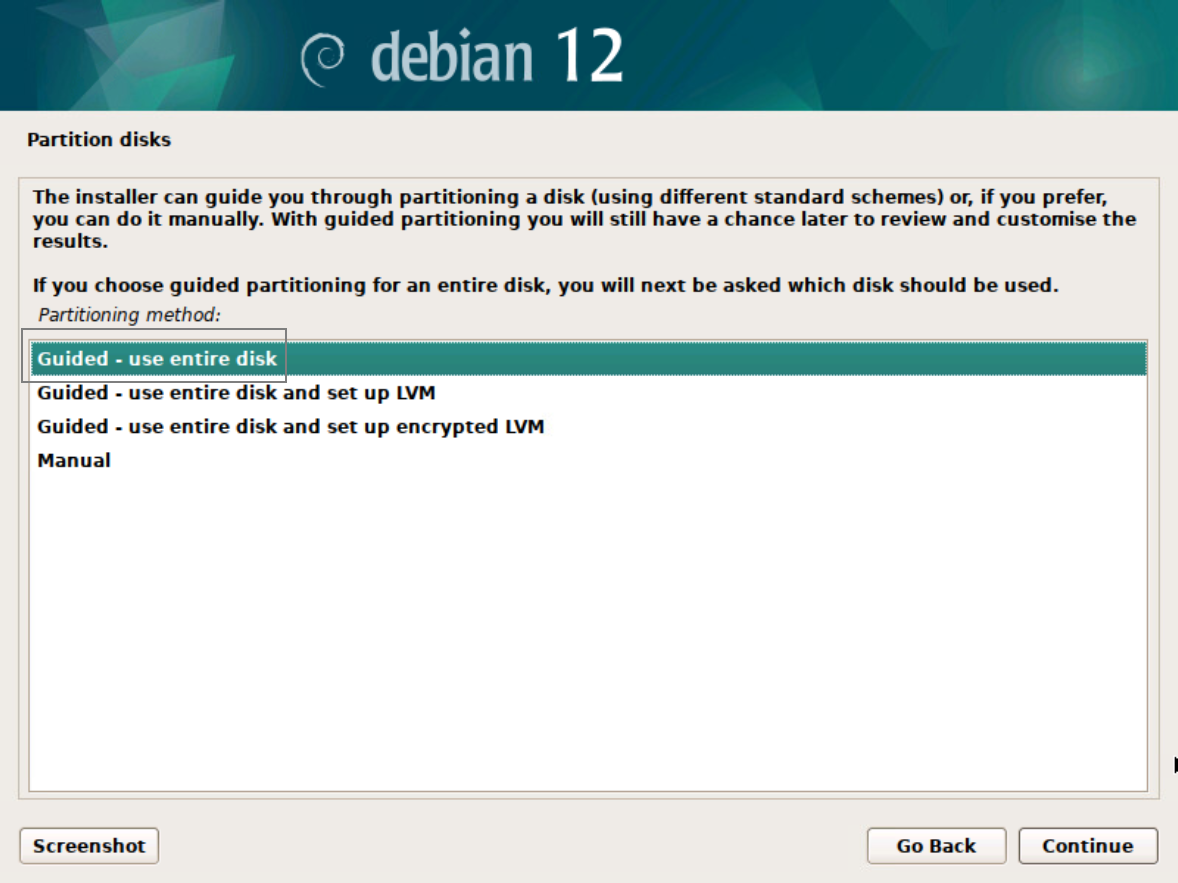
配置磁盘时,使用【引导使用整个磁盘】,此次安装后续全部默认不修改
二、Debian 12基础配置
2.1 配置静态IP
2.1.1 检查网卡名称

如截图所示,则应该使用 ens160 作为配置名
2.1.2 修改网卡配置文件
编辑/etc/network/interfaces文件
增加内容:
auto ens160
iface ens160 inet static
address 10.22.51.91
netmask 255.255.255.0
gateway 10.22.51.254
2.1.3 配置DNS
debian 12安装后默认没有/etc/resolv.conf 文件
添加以下内容:
2.1.4 重启网络服务
2.2 添加软件源
2.2.1 备份源配置文件
2.2.2 修改配置文件
通过命令vi /etc/apt/sources.list,打开源配置文件
2.2.3 添加阿里云
如果是新系统,默认是使用CD/DVD源,去掉只添加
deb https://mirrors.aliyun.com/debian/ bookworm main contrib non-free
PS:因为未通过SSH还有debian系统默认的vi和vim无法粘贴,先添加一条配置,可以安装一些基础软件,例如vim、ssh等
添加阿里云的 Debian 软件源配置如下,
deb https://mirrors.aliyun.com/debian/ bookworm main contrib non-free
deb-src https://mirrors.aliyun.com/debian/ bookworm main contrib non-free

deb https://mirrors.aliyun.com/debian/ bookworm-updates main contrib non-free
deb-src https://mirrors.aliyun.com/debian/ bookworm-updates main contrib non-free

deb https://mirrors.aliyun.com/debian-security bookworm-security main contrib non-free
deb-src https://mirrors.aliyun.com/debian-security bookworm-security main contrib non-free
配置说明:
deb行用于指定软件包下载源(二进制包)。deb-src行用于指定软件包源代码下载源(如果你需要编译软件包,可能会用到)。- 这里配置了 主仓库(main)、贡献仓库(contrib) 和 非自由仓库(non-free),你可以根据实际需求调整。
2.2.4 更新软件源
2.3 安装配置vim
Debian12 的
vi和vim默认都无法复制粘贴内容(如通过crt无法鼠标右击粘贴),需修改配置文件
2.3.1 安装vim
2.3.2 修改vim配置
find / -name defaults.vim # 搜索defaults.vim配置文件
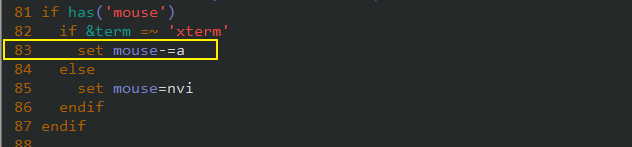
vim /usr/share/vim/vim90/defaults.vim # 编辑defaults.vim配置文件
在配置文件,第83行找到set mouse=a,将其改为set mouse-=a,保存退出,测试vim即可;
2.4 配置SSH远程
默认情况下,Debian12未安装openssh-server,安装后默认无法通过SSH远程,需要修改配置
2.4.1 安装 openssh-server
2.4.2 检查 SSH 服务是否启动
安装后,服务默认会自动启动
2.4.3 修改ssh配置文件
修改配置目的是用于crt 连接到debian系统
编辑 /etc/ssh/sshd_config 配置文件,修改或添加以下内容:
vim /etc/ssh/sshd_config  # 如果没有vim先安装:apt install -y vim

PermitRootLogin yes
PasswordAuthentication yes
2.4.4 重启ssh服务
修改完成后,重启ssh服务即可:
2.5 扩容卸载硬盘
2.5.1 查看磁盘信息
虚拟机创建了一块500G的硬盘默认未挂载
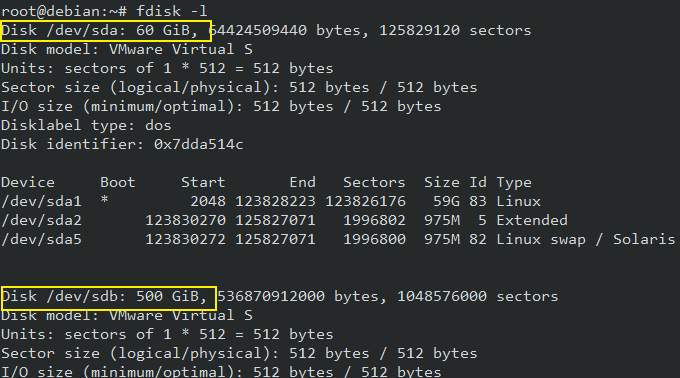
从图可知500G的磁盘,/dev/sdb,→ 空白磁盘(未分区)
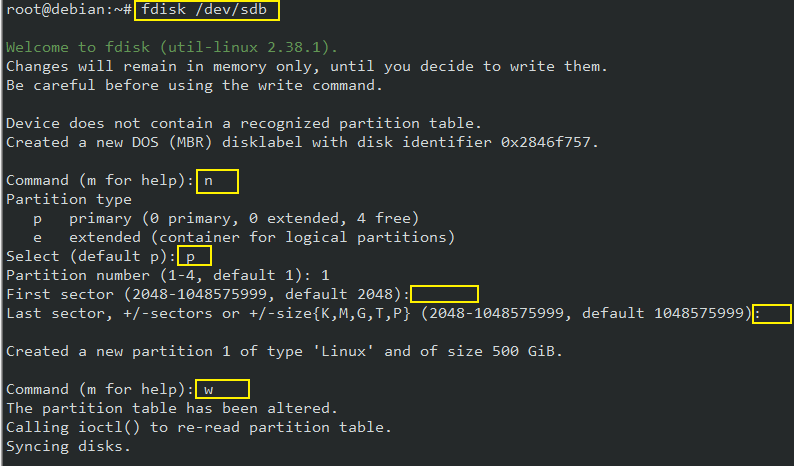
2.5.2 使用 fdisk 创建分区
然后如下操作:
截图如下:
空白处为回车选项
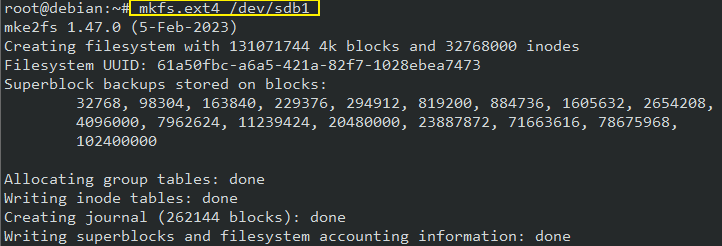
2.5.3 格式化新分区为 ext4 文件系统
2.5.4 创建挂载目录 /data
2.5.5 临时挂载分区
2.5.6 设置开机自动挂载
2.5.6.1 获取uuid
2.5.6.2 编辑 /etc/fstab
添加内容
2.5.7 卸载/data
确认 /data 挂载的磁盘(/dev/sda1)没有数据、也不再使用
删除 /etc/fstab的内容
不删除此项,开机导致系统无法进入,需进单用户模式删除
2.5 安装基础软件
apt -y install vim              # 安装vim
apt -y install net-tools        # 安装网络工具
apt -y install nginx            # 安装nginx
2.6 系统信息
2.6.1 查看 Debian 系统版本
2.6.2 查看详细发行版信息
Text Onlyroot@debian:~# cat /etc/os-release PRETTY_NAME="Debian GNU/Linux 12 (bookworm)" NAME="Debian GNU/Linux" VERSION_ID="12" VERSION="12 (bookworm)" VERSION_CODENAME=bookworm ID=debian HOME_URL="https://www.debian.org/" SUPPORT_URL="https://www.debian.org/support" BUG_REPORT_URL="https://bugs.debian.org/"
2.6.3 查看内核版本
2.6.4 查看系统架构
2.6.5 查看 CPU、内存、主机名、内核等摘要信息
Text Onlyroot@debian:~# hostnamectl Static hostname: debian Icon name: computer-vm Chassis: vm 🖴 Machine ID: e38b093286134c8fa091bcb73c132752 Boot ID: 31b53bf67c1a4d0c88c4569464c9c778 Virtualization: vmware Operating System: Debian GNU/Linux 12 (bookworm) Kernel: Linux 6.1.0-35-amd64 Architecture: x86-64 Hardware Vendor: VMware, Inc. Hardware Model: VMware Virtual Platform Firmware Version: 6.00
2.7 Debian12初始化
初始化说明:
1.Debian默认未安装防火墙(ufw),检查命令
ufw status,command not found,说明未安装2.Debian默认未安装iptables
3.Debian 默认不启用
SELinux,检查命令sestatus,command not found,说明未启用4.Debian 默认未安装
NetworkManager、kdump、postfix、auditd
2.7.1 修改文件:/etc/security/limits.conf
添加内容:
2.7.2 创建yunwei账号
创建
yunwei用户,设为 root 权限,并免 sudo 密码切换 root
2.7.2.1 创建用户并设置密码:
2.7.2.2 加入 sudo 权限
2.7.2.3 设置 sudo 免密码
apt install sudo -y # 安装sudo工具
执行visudo编辑:
在root添加这行:
默认使用的是nano编辑器,使用方法:
——————————————————————————————————————
——————————————————————————————————————
或者使用如下方式:
在root添加这行:
如无root权限,可将/etc/passwd的yunwei改为0:0与root一致即可。
2.8 服务器安全
2.8.1 安装配置SELinux
2.8.1.1 安装 SELinux 支持包
2.8.1.2 启用 SELinux
Text OnlyActivating SE Linux Generating grub configuration file ... Found linux image: /boot/vmlinuz-6.1.0-35-amd64 Found initrd image: /boot/initrd.img-6.1.0-35-amd64 Warning: os-prober will not be executed to detect other bootable partitions. Systems on them will not be added to the GRUB boot configuration. Check GRUB_DISABLE_OS_PROBER documentation entry. done SE Linux is activated. You may need to reboot now.
2.9 Debian进单用户模式
启动系统时,如何进入恢复模式(单用户模式)
1.在 Debian GRUB 菜单界面,选中 Advanced options for Debian

选择一个内核后面带有 (recovery mode) 的选项
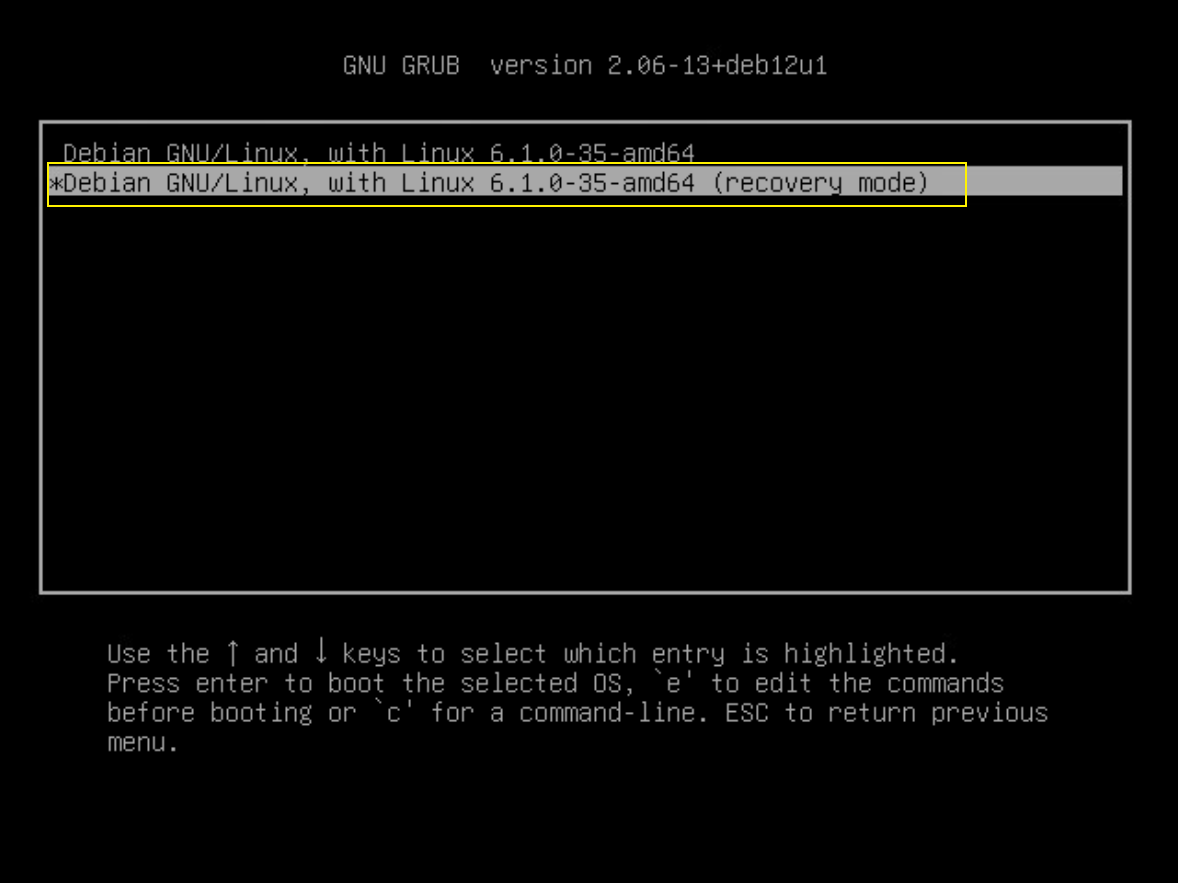
进入后,输入root密码即可。